Exploring the project
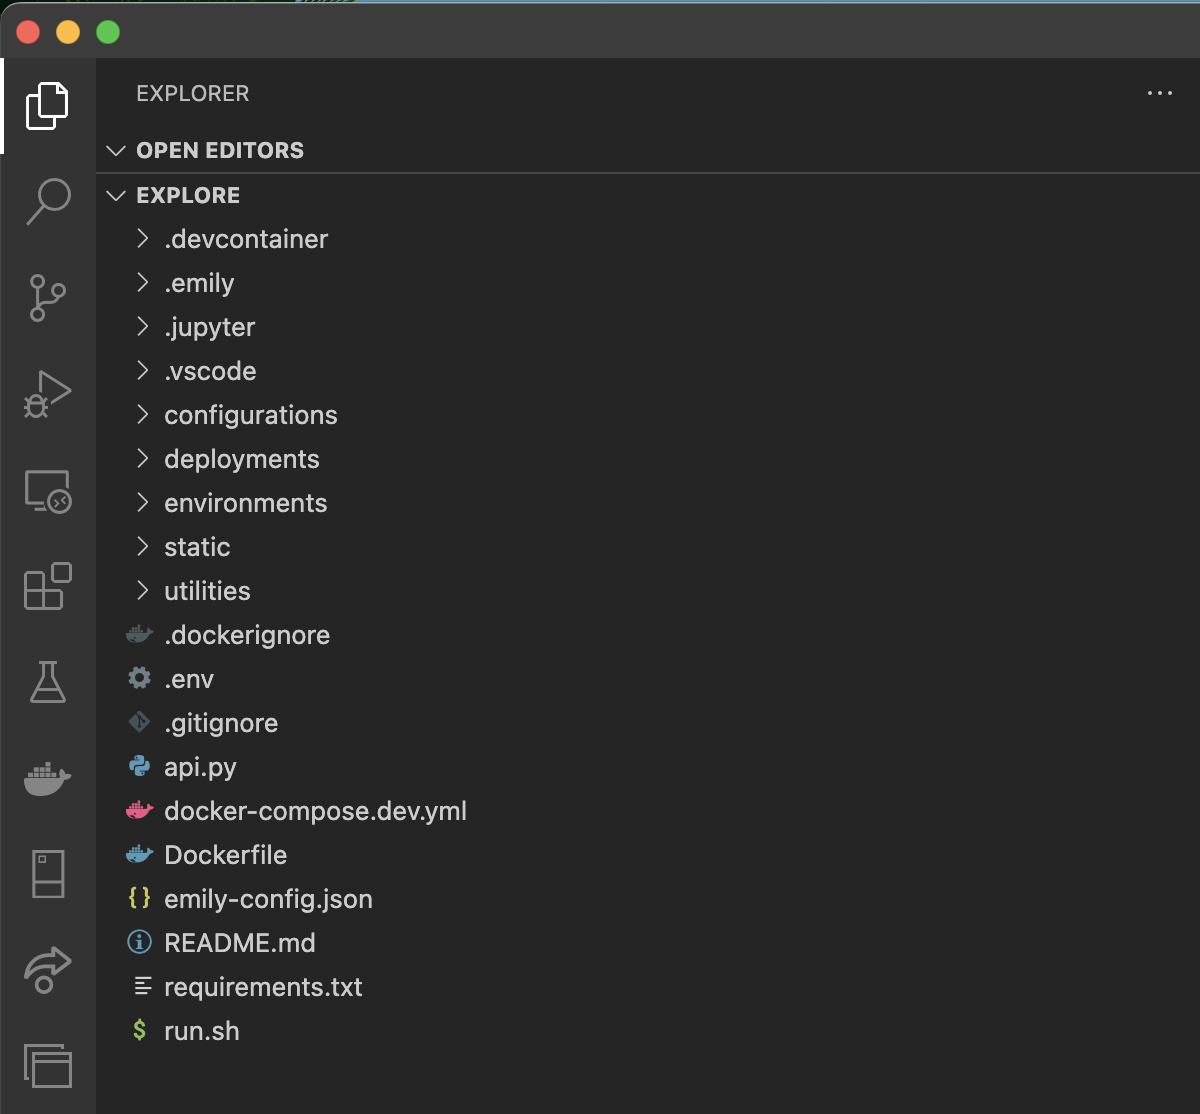 You should have a few files at this point. Let's explore what Emily has generated for us.
The README.md
First and foremost, all Emily projects ship with a README.md outlining how to use and configure the template.
The api.py
The heart of our application is in api.py. This file is the entrypoint of our web API, and is what will
be run directly by Gunicorn under deployment.
You should be able to immediately run your api by running python api.py in the VS Code terminal:

The first thing the api.py file does is initialize and configure middleware for the API:
app = FastAPI()

initialize_logging()
initialize_logging_middleware(app)

app.add_middleware(
    CORSMiddleware,
    allow_origins=["*"],
    allow_credentials=True,
    allow_methods=["*"],
    allow_headers=["*"],
)
Logging
Emily APIs use loguru for logging by default, which is configured here.
initialize_logging()
initialize_logging_middleware(app)
The first piece of configuration initialize_logging() establishes full control of Uvicorn logs, and adds two
sinks for the loguru logger package - one sink sending logs to the terminal, and one sending them to a file.
The subsequent call initialize_logging_middleware() ensures that all HTTP requests (and their responses) are logged to all sinks.
The initialize_logging_middleware() can very simply be extended to log any information you want before and after a request has been handled.
If you need to send logs somewhere else as well (e.g., an ElasticSearch database), simply add a custom log sink
inside the initialize_logging() function!
CORS
The second part of middleware configuration is enabling CORS on the web API, allowing any origin, method, and header in resource sharing. This allows browsers to accept a page on a different domain than yours to access resources through your API.
app.add_middleware(
  CORSMiddleware,
  allow_origins=["*"],
  allow_credentials=True,
  allow_methods=["*"],
  allow_headers=["*"],
)
These CORS rules are very open and should be reviewed before going into production!
Endpoints
Emily APIs (except those created with the gRPC templates for streaming) use FastAPI for building REST APIs. In addition to being very fast, FastAPI provides a great developer experience, making it easy to create endpoints for HTTP methods with automatic parameter, header, and body parsing, response formatting, etc.
@app.get('/api')
def hello():
    return {
        "service": Environment().COMPOSE_PROJECT_NAME,
        "uptime": get_uptime()
    }


@app.get('/')
def index():
    return HTMLResponse(
        render(
            'static/index.html',
            host=Environment().HOST_IP,
            port=Environment().CONTAINER_PORT
        )
    )
The first endpoint GET /api simply returns the name of project along with the amount of time the API has been running.
The second endpoint GET / is an index endpoint returning a sample HTML page. Run api.py and visit http://localhost:4242/ to see it!
The Dockerfile
Emily leverages Docker and Docker Compose to unify the development experience with production deployments.
The Dockerfile specifies the Docker image that your project container(s) will be based on.
The Dockerfile configures the following:
- Fetches the appropriate base image from
ambolt/emilyon DockerHub - Performs a cache-safe copy of SSH configuration scripts needed for PyCharm
- If you do not use PyCharm, this step is skipped. The scripts only exist when opening a project using the
pycharmeditor.
- If you do not use PyCharm, this step is skipped. The scripts only exist when opening a project using the
- Creates a user with your project's name (truncated)
- Copies and installs requirements from the requirements.txt file
- Copies the remaining project files
- Fires up the API through the
run.shscript (see "The run.sh")
The Dockerfile is there for you to adjust as needed, and the configuration in it is there for convenience.
Emily makes no requirements for the contents of the Dockerfile during deployment, so go ahead customize it to your needs.
The configurations/ and docker-compose.*.yml
Emily projects contain several docker-compose.yml files that are combined to scaffold the development and production environment.
Emily stores docker-compose.yml files in the following places:
-
./configurations/<configuration>/docker-compose.*.ymlfor configuration files. These files specify the configuration your application is running under, e.g., which ports are open, internal networks, volumes, and other services that might be used by your project.Configurations are a core concept in Emily, and make it easy to work with and deploy your project to different contexts. For example, the
devconfiguration might have port 4242 open against the host, while yourprodconfiguration might only have ports 80 and 443 open and routed through an Nginx reverse proxy rather than going directly to your service.When opening a project, the project is opened in the
devconfiguration by default.See the
emily configurationcommand docs for details on how to add and manage your project's configurations. -
./docker-compose.dev.ymlfor development work. This file is only used when opening an Emily project. It simply registers a two-way bound volume from the project directory to the container. This means that any changes on your machine replicate in the container, and vice versa. In this way, you can develop from inside your container and commit your changes to version control from your host machine. -
./{.devcontainer, .jupyter, .idea}/docker-compose.ymlfor editor-specific configurations. These files are only used when opening an Emily project.
The environments/
In addition to the ./configurations/ directory, your project also contains a similarly structured ./environments/ directory with similarly named subdirectories.
The contents of an environment directory (e.g. ./environments/dev/) is simply a number of *.env files.
Environments are also core concepts in Emily. When an Emily project is opened or deployed, it's done in the context of a configuration within an environment. The environment, in this case, simply specifies the environment variables
the application has access to. All files following the *.env naming scheme inside the environment directory will be read, merged, and provided to the container.
Environments make it easy to re-use configurations across deployment environments. For example, we could keep separate database credentials in
./environments/dev and ./environments/staging and simply swap them out under the same configuration during deployment.
See the emily environment command docs for details on how to add and manage your project's environments.
The deployments/
As the final core concept, your project contains a ./deployments/ directory structured similarly to ./environments and ./configurations.
In Emily, a deployment specifies the following:
- Which configuration to deploy the project in
- Under which environment to deploy it
- To which server it should be deployed
By default, all Emily projects contain a ./deployments/local/ deployment specifying to deploy ./configurations/dev and ./environments/dev using the local machine as the server.
This deployment is used when opening Emily projects. In fact, the difference between deploying locally and opening a project is very small:
emily deploy <project> --deployment local
# 1. Use all ./environments/dev/*.env
# 2. Use all ./configurations/dev/docker-compose.*.yml
# 3. Start container

emily open <project>
# 1. Use all ./environments/dev/*.env
# 2. Use all ./configurations/dev/docker-compose.*.yml
#    - Use ./docker-compose.dev.yml
#    - Use ./<editor>/docker-compose.yml
# 3. Start container and editor
See the emily deployment command docs for details on adding and managing your project's deployment specifications.
The run.sh
When your project is deployed, the run.sh script is invoked unless overwritten by a docker-compose.*.yml file in the deployed configuration.
The run.sh script starts a WSGI HTTP server using Gunicorn that automatically load-balances between $N_WORKERS workers (defaults to 1), restarts
your workers to avoid memory leaks, and much more.
The run.sh is, like the Dockerfile, there for your convenience, and can be adjusted (or removed) as needed.
#!/bin/bash

BIND=$HOST_IP:$CONTAINER_PORT  # Address to listen on.
N_WORKERS=$N_WORKERS  # The number of workers to run in parallel (provided by default in .prod.env)
WORKER_CLASS=uvicorn.workers.UvicornWorker  # The type of workers to use.
TIMEOUT=300  # Workers silent for more than this many seconds are killed and restarted.
GRACEFUL_TIMEOUT=120  # Timeout for graceful workers restart.
MAX_REQUESTS=10000  # The maximum number of requests a worker will process before restarting (useful for preventing memory leaks)
MAX_REQUESTS_JITTER=4  # The jitter causes the restart per worker to be randomized by randint(0, max_requests_jitter). This is intended to stagger worker restarts to avoid all workers restarting at the same time.
LOG_FILE=gunicorn.log  # Access/error logs from gunicorn

exec gunicorn 'api:app' \
    --bind=$BIND \
    --workers=$N_WORKERS \
    --worker-class=$WORKER_CLASS \
    --timeout=$TIMEOUT \
    --max-requests=$MAX_REQUESTS \
    --max-requests-jitter=$MAX_REQUESTS_JITTER \
    --graceful-timeout=$GRACEFUL_TIMEOUT
The utilities/
All Emily projects ship with a number of useful utility modules:
./utilities/singleton.py- a decorator for turning classes into singletons../utilities/environment.py- a singletonEnvironmentclass for safely parsing and and accessing environment variables../utilities/logging/*.py- helper functions for configuring logging across the entire application.
Next steps
The best way to become truly familiar with a new codebase is to play with it. Let's build a real-world application in the next section: "Communicating through your API".